Software - Onboarding a new brand
b Onboarding a New Brand - Software Tools
Onboarding Video (Slightly out of date, steps below are more accurate)
Step-by-step Onboarding
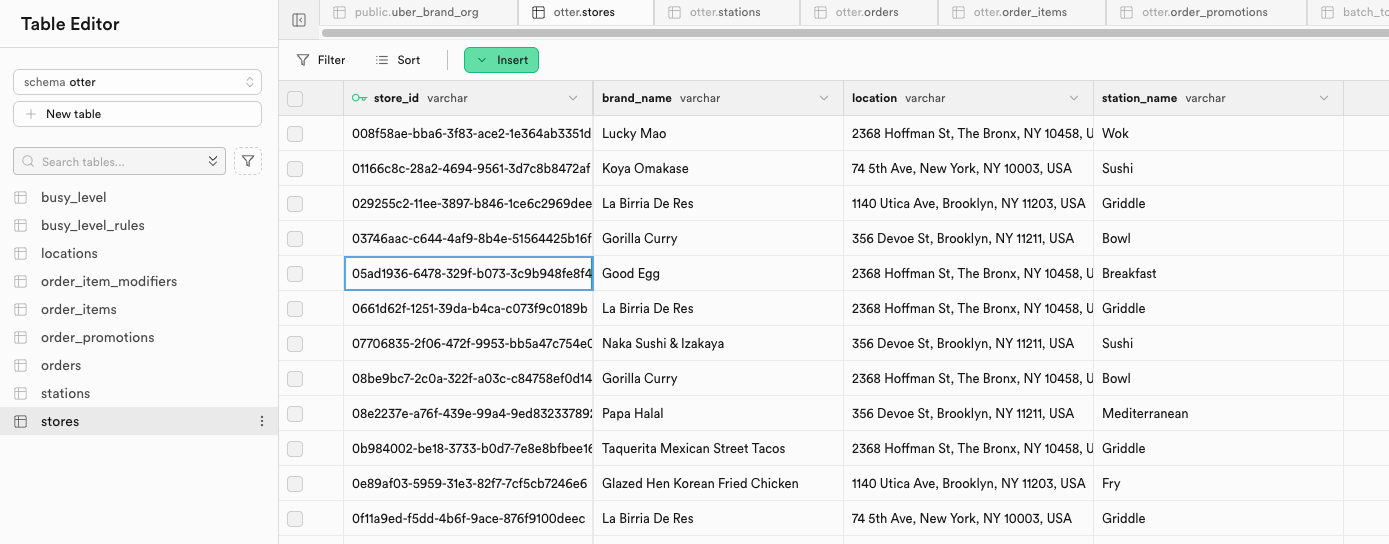
1. Get Store ID in Otter portal
- You can find it in the Otter Developer portal: developer.tryotter.com.
- Click the
Orbital Kitchens POS. - Go to
Stores→Onboarded. - Find the newly created brand and copy the
External Store Id.
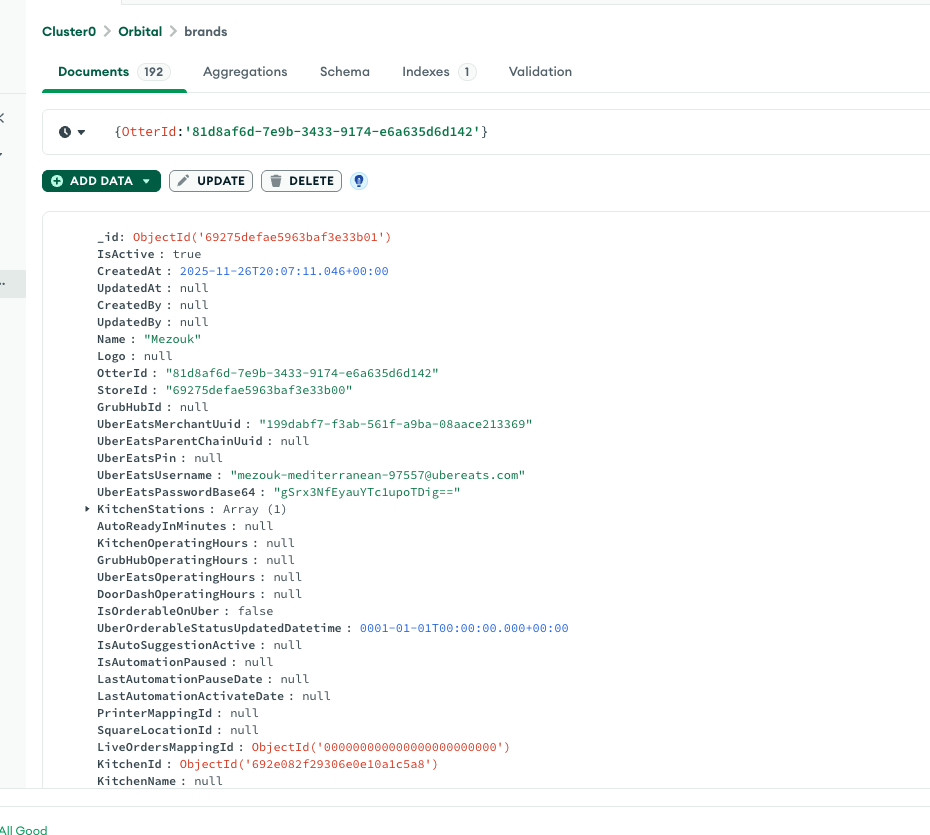
2. Update or Add new brand in MongoDB
- If Otter sends the webhook before you create the brand on our side, the store is created automatically.
- In the
brandcollection, search for the brand by filtering theOtterIdfield with theExternal Store Idcopied above. - If the brand already exists, update the
NameandKitchenIdfields. If it does not exist, create a new brand document. - Navigate to the
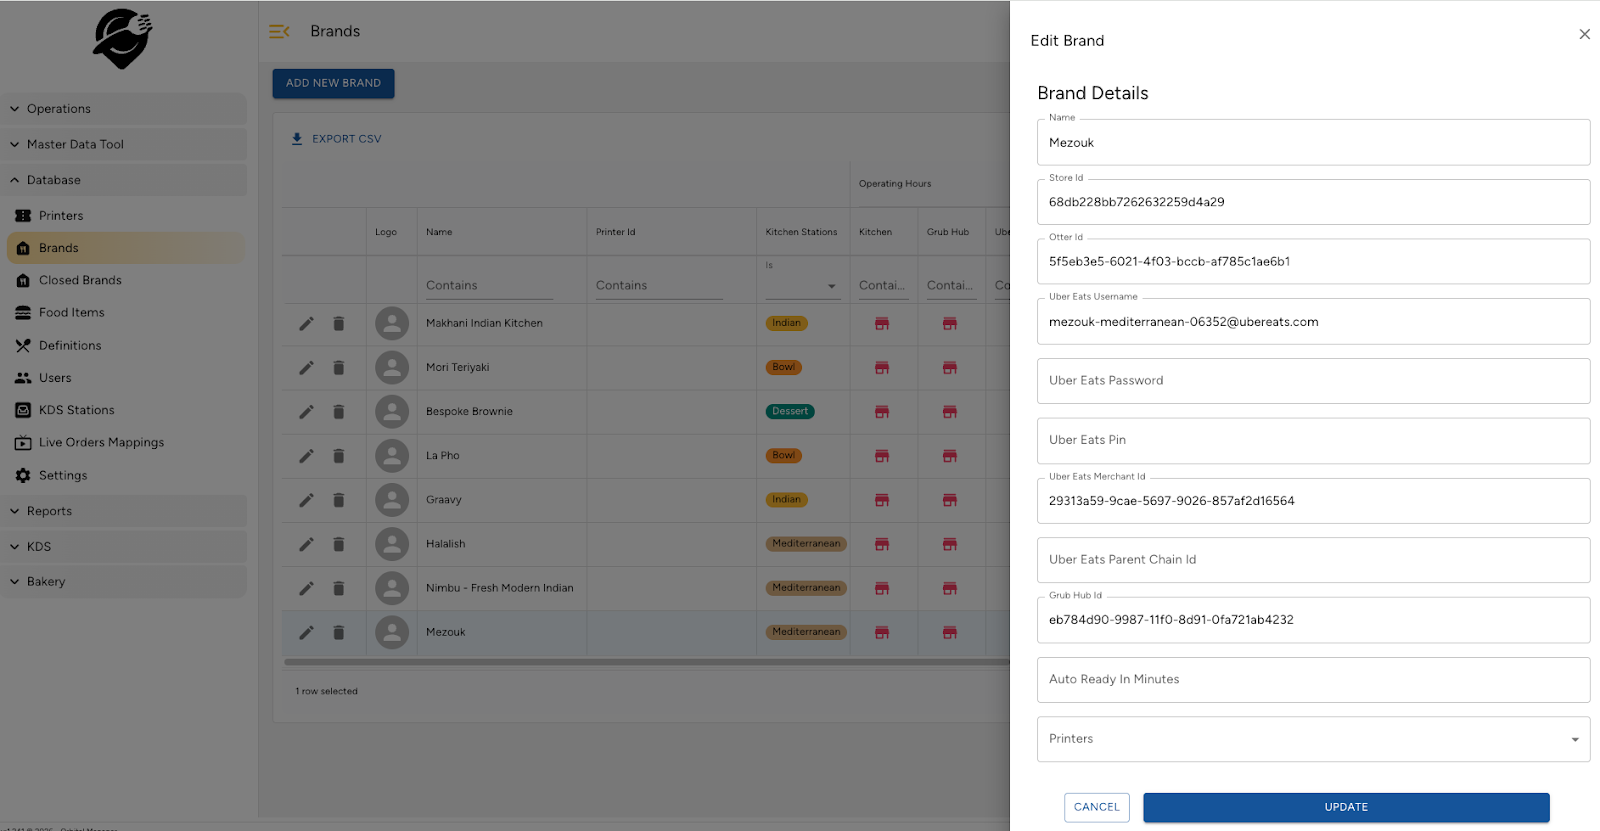
Database/Brandstab on the OK Manager page to view the new brand, then fill in the missing fields.
3. Add a new row in otter.stores table in Postgres
store_id is External Store Id in step 1